
Installing Android Remix OS in Virtualbox

If you want to install Android Remix OS into virtual environment follow this steps:

  • Download Remix OS for PC from http://www.jide.com/remixos-for-pc
  • Extract the zip file
  • Open Virtualbox
  • Name the virtual machine and choose Linux 32 or 64-bit and select at least 1024 RAM (see photo 1)
  • Create 8 GB or more disk (photo 2)

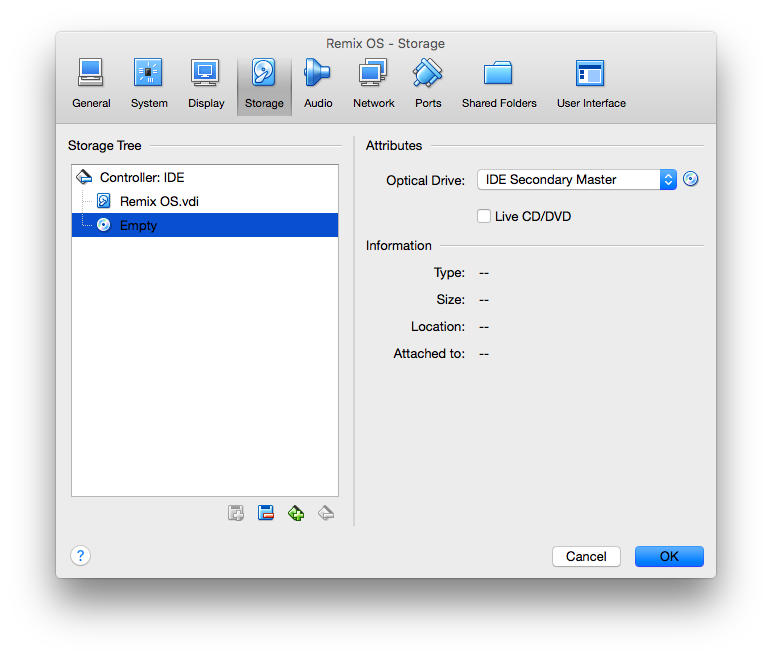
  • When machine is created go to Settings and choose Storage from the possible tabs
  • Click on a CD disk icon in the left window and then again click on CD icon on the right under Attributes and select Remix OS iso image you extracted from the zip file (photo 3)
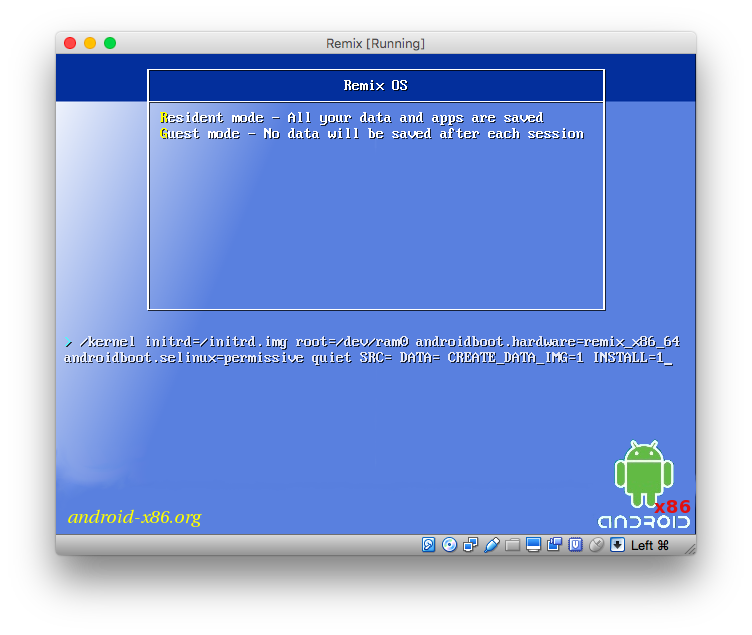
  • Start the machine
  • At the initial screen you need to hit TAB
  • On the options line hit space INSTALL=1 (photo 4)
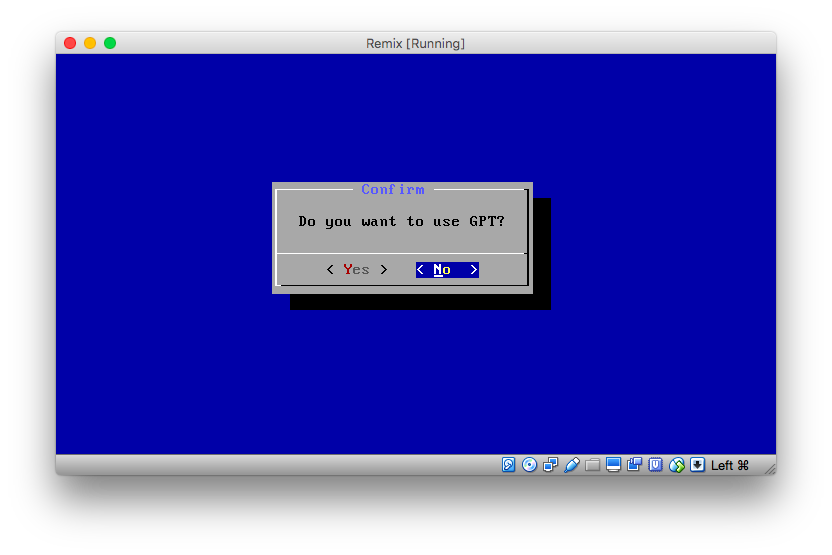
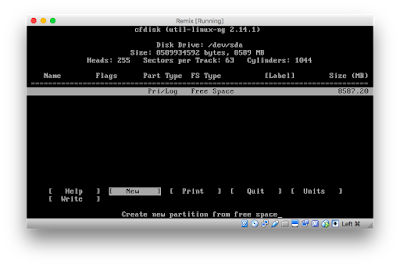
  • Once there select Create/Modify Partitions
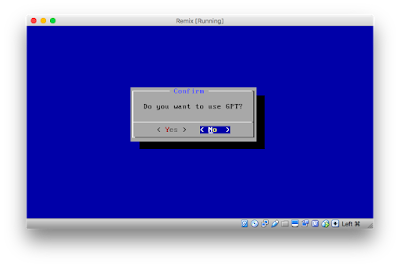
  • Don't use GPT (photo 5)
  • Create New Primary partition and make it Bootable (photo 6)
  • Select WRITE to write changes to disk
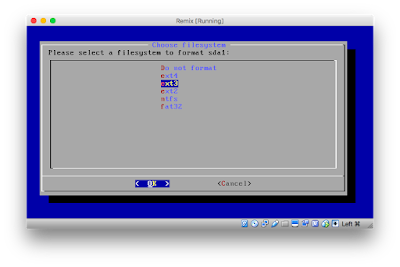
  • When finished select first disk
  • Format it as ext3
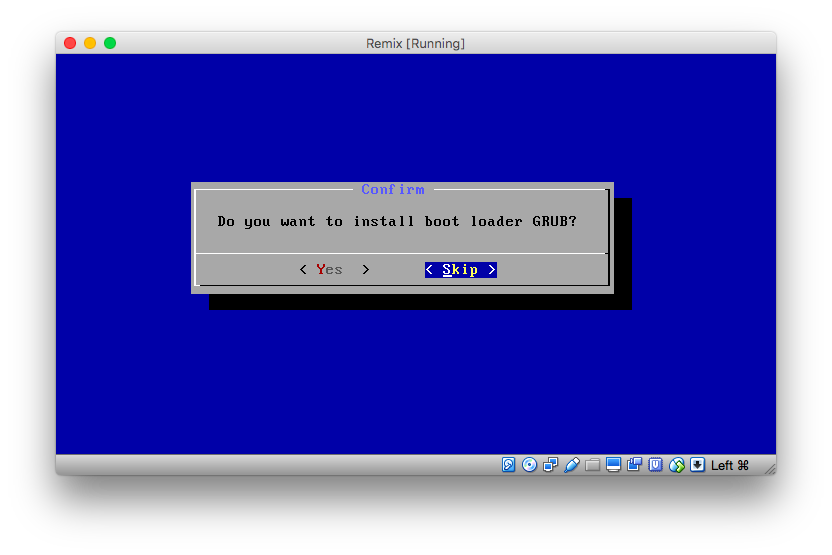
  • Install grub (DO NOT INSTALL GRUB EFI)
  • It will install Remix OS. Don't loose temper When you see RemixOS written on screen. It takes some time to proceed but it will. 


Popular posts from this blog

Netscaler vs Exchange 2019 "time out during ssl handshake stage

If you are using Citrix Netscaler as load balancer in front of Exchange 2019 server you must know this: Microsoft Exchange 2019 is secured by default and allows only TLS 1.2. Therefore default schannel settings are as follows (using IISCrypto tool from Nartac Software): While Citrix Netscaler offers following Cipher Suites: TLS_RSA_WITH_AES_256_CBC_SHA TLS_RSA_WITH_AES_128_CBC_SHA TLS_DHE_RSA_WITH_AES_256_CBC_SHA TLS_DHE_RSA_WITH_AES_128_CBC_SHA TLS_DHE_DSS_WITH_AES_256_CBC_SHA TLS_DHE_DSS_WITH_AES_128_CBC_SHA TLS_RSA_WITH_DES_CBC_SHA TLS_RSA_EXPORT_WITH_DES40_CBC_SHA TLS_RSA_EXPORT_WITH_RC2_CBC_40_MD5 TLS_DHE_DSS_WITH_DES_CBC_SHA TLS_DHE_DSS_EXPORT1024_WITH_DES_CBC_SHA TLS_DHE_DSS_EXPORT_WITH_DES40_CBC_SHA TLS_DHE_RSA_WITH_DES_CBC_SHA TLS_DHE_RSA_EXPORT_WITH_DES40_CBC_SHA TLS_RSA_EXPORT1024_WITH_RC2_CBC_56_MD5 TLS_DH_anon_WITH_DES_CBC_SHA TLS_DH_anon_WITH_AES_128_CBC_SHA TLS_DH_anon_WITH_AES_256_CBC_SHA TLS_DH_anon_EXPORT_WITH_DES40_CBC_SHA Now, you will fi

Reason: [{LED=250 2.1.5 RESOLVER.GRP.Expanded; distribution list expanded};{MSG=};{FQDN=};{IP=};{LRT=}]

 If you got this error checking the mail flow for a distribution group, it means the distribution group is closed and only internal senders can send e-mail to this group. When outside user sends e-mail to this group you get  Reason: [{LED=250 2.1.5 RESOLVER.GRP.Expanded; distribution list expanded};{MSG=};{FQDN=};{IP=};{LRT=}] Set Delivery for this group to internal and external users and your problem will be solved. 

Ports that need to be open on Firewall for Edge Transport servers

Ports that need to be open on firewall for Edge Server subscription with Hub Server to function properly: For Inbound traffic: SMTP - TCP port 25 (from Internet) SMTP - TCP port 25 (from Edge server to Hub server on internal network) For Outbound traffic: SMTP - TCP/UDP port 25 (from Edge to Internet) SMTP - TCP/UDP port 25 (from Hub to Edge server) LDAP for EdgeSync - TCP port 50389 (from Hub to Edge server) Secure LDAP for EdgeSync - TCP port 50636 (from Hub to Edge server) Since Edge server needs to communicate with Hub server it is important that it can resolve Hub transport servers by FQDN and Hub transport servers must be able to resolve Edge servers by its FQDNs. To accomplish this you need to either open 53 (DNS) port and configure internal network adapter to use internal DNS but as a security precaution I would suggest to enter DNS records for Edge servers on local DNS manually and to fill hosts file on Edge servers with FQDNs for Hub transport servers.